
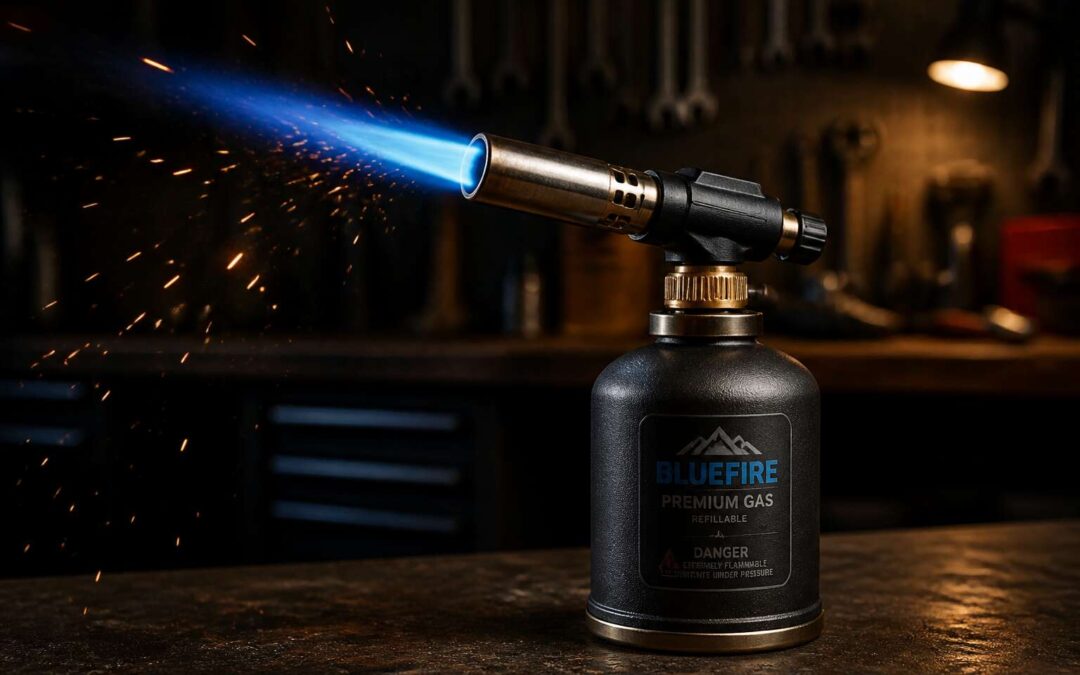
The Basics of Portable Torch Fuel Systems
Common Fuel Types: Propane, Butane, and MAPP Gas
The hiss of escaping vapor is a sound most people ignore. For those who use a gas bottle with torch, that sound signals a controlled release of energy. Portable fuel systems are simple in construction, but each common gas type behaves differently.
Propane vaporizes reliably in cold weather, making it the choice for outdoor repair work. Butane produces lower pressure and a gentler flame, suitable for delicate soldering indoors. MAPP gas reaches a higher temperature, suitable for cutting and brazing.
Consider these differences when selecting a fuel:
- Propane: consistent pressure, works in low temperatures.
- Butane: slower release, cleaner combustion.
- MAPP gas: hotter flame, rapid heat transfer.
A gas bottle with torch requires proper handling. The wrong fuel creates a weak flame or an unstable flare. I have seen that mistake end a job in seconds. Know your task before you ignite!
Anatomy of a Torch Gas Canister
A gas bottle with torch is a study in controlled simplicity. The canister is a sealed vessel, but the valve is the true heart of the system. This small mechanism regulates the flow of fuel as it transitions from liquid to vapor. A self-sealing valve ensures the connection to the torch head is airtight.
The torch head itself contains a gas tip and a mixing tube that draws in oxygen to stabilize the flame. Different tasks require specific tips for a precise heat profile.
The anatomy is straightforward:
1. The fuel canister holds the pressurized gas.
2. The valve controls the release.
3. The torch head mixes the fuel with air.
4. The tip shapes the final flame.
Be aware that the canister’s construction, usually steel or brass, affects its weight and durability on a worksite. A low-pressure valve, common on many units, allows for fine adjustments to the flame. This is essential when moving from a heavy duty brazing job to a delicate electronic repair. Never force a connection if the threading resists; you risk damaging the valve and compromising the seal. That hissing sound should only occur when you open the valve, not when you are attaching the head! A proper fit is critical for safety and performance, especially when working outdoors in the South African climate where temperature changes can affect internal pressure.
How the Torch Valve Connects to the Bottle
The connection between torch and canister is the primary safety point. A gas bottle with torch depends on this interlocking of threads and seals.
Most valves use EN 417 standard threading, though some systems employ a quick-connect coupling. When you rotate the torch head clockwise, the internal stem presses against the valve pin, opening the fuel path. This mechanism, called a valve core, ensures no gas escapes during attachment.
Here is the sequence:
1. The gasket seats against the valve face.
2. The threaded collar locks into place.
3. The pin opens only after full engagement.
This design prevents leaks before they begin. I have seen worn O-rings fail under South African heat. A gas bottle with torch should never hiss at the join.
Key Differences Between Disposable and Refillable Bottles
Most people overlook the fuel system until it fails, and that is a costly mistake. A gas bottle with torch operates on either a disposable or refillable foundation. Disposable canisters arrive sealed with fixed fuel. Refillable bottles allow you to top up with a bulk cylinder.
The core difference lies in pressure management. Disposable units hold a precise mix under high pressure. Refillable systems rely on a separate regulator to control flow. Your choice affects portability and long term cost.
- Disposable: light, convenient, no maintenance
- Refillable: heavier, durable, lower per-use price
South African conditions demand careful inspection of both types. Heat can warp seals, so I always check the valve seat.
Critical Safety Practices for Torch Gas Bottles
Safe Storage Locations and Temperature Limits
On a 40 degree Celsius Highveld afternoon, I have watched a gas bottle with torch left in direct sunlight endure expanding internal pressure. Propane expands, pressing against the canister walls with growing force. Store your gas bottle with torch in a shaded, well-ventilated area. Never leave it in a closed car boot or near heat!
Temperature limits are strict. Most disposable cylinders tolerate between 5 and 50 degrees Celsius, but the safe operating range narrows considerably above 35 degrees. Below 10 degrees, pressure drops and the flame sputters.
Safe storage follows three rules:
- Canisters remain upright and secured against tipping.
- A distance of one metre separates the canister from combustible materials.
- The valve area receives inspection for corrosion before each use.
Direct afternoon sun poses a risk. The air might feel pleasant, yet the metal surface absorbs radiant heat beyond the ambient reading. A reflective cover offers protection in unshaded areas.
How to Perform a Leak Soap Test
Most users treat a gas bottle with torch as a solid object, yet the connection point remains the weakest link. Propane escapes silently at the valve stem or the threaded collar. That hiss you hear is an alarm; the scent added to the gas is another. For a definitive check, you need no electronic gadget. Soapy water performs the job with remarkable precision.
Mix a teaspoon of dishwashing liquid into a cup of water. Apply the solution generously with a small brush or a rag. Cover every joint where metal meets metal.
– Inspect the valve base for bubbles while applying pressure.
– Swab the nozzle tip and the O-ring seat.
– Watch for a slow, growing foam rather than a burst.
A flame test tells you less. A blue flame means clean combustion, but a yellow, dancing tip suggests impurities or a partial blockage. If bubbles appear, turn the valve closed immediately and tighten the fitting. Retest. Replace the bottle if the leak persists. I count this visual check as mandatory before every new cylinder is connected. It takes thirty seconds and removes the guesswork from a gas bottle with torch operation.
Lighting and Extinguishing Procedures
Most torch accidents happen after the flame goes out. The lighting sequence matters, but extinguishing demands equal discipline. With a gas bottle with torch, always close the bottle valve before the torch valve. This order purges the line of residual fuel. Reverse it, and pressurised gas stays trapped in the hose. A pinhole leak then becomes your problem, invisible until the next ignition.
For lighting, open the valve a quarter turn. Wait a beat. Strike with a flint sparker. A piezo igniter works too. Never hover over the nozzle with a match!
Follow this shutdown routine every single time:
- Close the valve on the gas bottle with torch completely.
- Allow the remaining gas in the burner to exhaust.
- Listen for the last hiss, then cap the torch.
That final hiss is your confirmation. When it stops, the system is inert.
Ventilation Requirements for Indoor Use
There is a quiet danger in using a gas bottle with torch indoors, and it has nothing to do with the flame you see. It is the invisible exhaust you don’t notice. Propane and butane consume oxygen as they burn, and in a sealed room, the air thins faster than you expect. Headaches, dizziness, or a sudden heaviness in your limbs mean you are already past the safe threshold.
Ventilation is not optional, it is a non-negotiable survival rule. Open two opposing windows to create a cross-draft before you even touch the valve. Never rely on a single ceiling vent or an open door. These are the minimum conditions for indoor work:
– Maintain a clear path for air to move from floor to ceiling.
– Keep the work area below head height if possible.
– Position the gas bottle with torch near the airflow source, not the opposite corner.
If you smell gas at any point, stop work immediately and step outside for ten full minutes. Your nose is the best sensor you have, but it only works if you trust it. Indoor air quality changes quickly, and by the time you feel the effects, the moment for action has already passed. Treat every indoor session as a temporary arrangement, never as a permanent workshop setup.
Transporting Gas Bottles in a Vehicle
One loose gas bottle with torch in a bakkie caused a fire that gutted the vehicle in under four minutes. That is the reality of transporting fuel without care. The bottle rolls, the valve cracks, and the gas pools in the cabin. I always secure mine upright, with the valve cap locked and a window open. The rules are few but absolute:
– Place the bottle on a flat, non-slip surface.
– Wedge it with bags or boxes so it cannot shift.
– Never leave it in a closed boot for more than an hour.
Stop every two hours and sniff the air. If you smell anything, pull over and air out the car. The gas bottle with torch is a tool, but on the road it becomes a hazard. Respect it as you would any ignition source.
Choosing the Ideal Torch and Fuel Bottle Setup
Comparing Regulator Designs and Flow Control
One third of portable gas in South African workshops is wasted through mismatched regulators. A gas bottle with torch is only as efficient as the flow control between them. Choosing the ideal setup means deciding how precisely you need to meter the flame. Fixed regulators are simple and durable, but they lack adjustability. Variable models let you set the output from low to high, which suits tasks like soldering or searing.
- Single stage regulators maintain a constant pressure until the bottle is nearly empty.
- Dual stage regulators offer stable performance in cooler weather.
- Precision valves provide fine control for detailed work.
Your allowance for flow control determines the final choice. Pick based on your tolerance for guesswork!
Assessing Compatibility with Soldering and Culinary Torches
South African workshops keep soldering torches beside culinary torches, but the two tools pull very different behaviour from the same fuel. A soldering torch wants a thin, steady flame for delicate joints. A culinary torch needs a softer, wider blast for tasks like finishing a custard. One gas bottle with torch works for both only if the head matches the job.
Torch heads draw fuel at different rates. Fine soldering work uses a low draw to avoid overheating the workpiece. A chef’s sear demands a sudden, high output. That difference changes how long a 400 gram cartridge lasts.
- Low draw suits precision metalwork.
- High draw suits quick culinary sears.
Bottle position also influences performance. The gas bottle with torch setup functions correctly when the pickup tube stays submerged in liquid fuel. Tilting the torch too far in either direction starves the flame.
Weight and Portability for Site Work
A heavy bottle becomes a burden when you carry it across a site all day. The ideal setup for site work balances fuel capacity against the physical effort of hauling equipment. A 400 gram cartridge suits quick tasks, while a larger cylinder keeps you working longer between refills.
Portability affects how safely you handle the equipment. A compact gas bottle with torch is easier to stabilise on uneven ground and simpler to pack into a bakkie at the end of the shift. Consider the full rig weight before you commit to a configuration:
- Bottle weight when full
- Torch head and hose weight
- Carry case or protective sleeve
That total determines whether the setup stays practical through a long working day.
Evaluating Fuel Purity and Performance Brands
When your flame sputters on a job site, the culprit is often the fuel, not the hardware. Propane, butane, or MAPP can lose punch if impurities sneak into the canister. A clean, consistent mixture translates into steady heat and predictable ignition. Some brands test their product to stricter tolerances than others. That difference matters when you rely on a gas bottle with torch for detailed soldering or culinary work.
Consider these red flags when you evaluate a supplier:
– No visible purity rating on the cylinder label
– Inconsistent pressure across identical canisters
– An oily film around the valve after fitting a torch head
These signs often point to cheap fillers. Stick with established manufacturers that publish their gas composition. Performance brands also maintain stricter quality checks for propellant ratios and internal lining quality. Your torch may accept any bottle, but the fuel decides whether your work looks clean or full of blisters.
Cost per Usage: Disposable vs. Refillable Options
A torch that sputters is a nuisance, but a torch that costs you a fortune in fuel is a budget leak. The question of disposable versus refillable bottles often comes down to how often you actually light the thing. A weekend warrior using a gas bottle with torch for crème brûlée will burn through a disposable canister over months. A plumber sweating pipes daily will discard several in a single week. That is where the real arithmetic begins.
The initial outlay for a refillable system is steeper. You purchase the bottle, the regulator, and the adapter. The gas itself, however, is sold by the litre and costs a fraction of the disposable equivalent. Over a year of steady use, the savings become undeniable. Consider the factors that tip the balance:
– Frequency of use per week
– Cost per gram of fuel in each format
– Storage space for spare cylinders
– Local availability of refill stations
Disposables win on convenience and zero maintenance. They are lighter to carry and require no special equipment. But every empty cylinder represents a trip to the shop and a piece of metal that must be recycled. Refillables win on economy and consistency, provided you have a supplier nearby. The choice, in the end, is a measure of your patience versus your wallet. I have seen seasoned tradesmen swear by refillables while hobbyists cling to disposables, and both are right. The gas bottle with torch is only as economical as the habit behind it.
Maintenance, Troubleshooting, and Longevity
Cleaning the Torch Nozzle and Air Intake
The flame that once roared with surgical precision can dwindle to a lazy orange tongue. That is the first sign of a clogged nozzle. Carbon deposits and soldering flux accumulate in the brass orifice, starving the flame of oxygen. Before you blame the gas bottle with torch, inspect the air intake slots for dust and grease.
Troubleshooting starts with a slight hiss but a weak flame. Remove the nozzle and soak it in acetone for ten minutes. Use a fine wire to clear the orifice, then blow out loose debris. Here is the sequence I follow each time:
1. Detach the nozzle from the gas bottle with torch.
2. Clean the air intake with a soft brush.
3. Reassemble and test the flame on a low setting.
A clean torch burns hotter and lasts longer.
Inspecting Seals, O-Rings, and Threads
The most common torch failure I see is a cracked O-ring, not an empty canister. The rubber seal inside the coupling is the most neglected component of any gas bottle with torch. South African heat and coastal humidity accelerate the perishing process. A seal that looks fine often shows hairline fractures when flexed gently.
Threads deserve the same scrutiny in any maintenance routine. Each connection grinds the mating surfaces together. Aluminium threads are soft and strip without visible warning. When you attach a gas bottle with torch, feel for smooth engagement. Any hesitation suggests cross-threading cutting grooves into the valve.
- Examine the O-ring for flat spots and cracks before use.
- Wipe threads with a lint-free cloth to check for aluminium dust.
- Replace worn seals with the correct valve size.
Seals and threads fail progressively. The hiss on Wednesday was a crack on Monday. Longevity depends on seeing it first.
Fixing Weak Flame or Flashback Issues
A yellow flame is a silent confession that your gas bottle with torch is struggling to breathe. Weak flames usually signal a blocked nozzle or a failing regulator diaphragm. The torch is asking for attention, not replacement. Inspect the nozzle for carbon deposits first. A pin or wire brush can clear it, but avoid enlarging the orifice.
Check the gas flow before you disassemble anything else. A half-turn of the valve should produce a pronounced hiss. If the sound is thin, the canister pressure is suspect. Flashbacks, however, are more of a threat and need immediate focus. A hissing burner that suddenly pops and dies means the gas mixture is burning inside the tube. This is a safety hazard.
– Verify the nozzle size matches the fuel type.
– Confirm the air intake shutter is open to the correct position.
– Test the valve for smooth operation from closed to full opening.
Flashbacks often occur when the tip overheats. Let the torch cool for several minutes. The internal combustion caused by a flashback can warp the gas bottle with torch valve stem. A warped stem will leak under pressure. Life expectancy of the entire assembly hinges on this component. Rapid temperature swings from coastal sun to cold winter mornings can cause hairline cracks in the valve body, making a stable flame impossible to maintain.
Knowing When a Bottle Is Empty or Expired
An empty bottle often imitates a faulty regulator. Weigh it when suspicion arises. A standard disposable canister loses roughly three hundred grams of mass when depleted. If your gas bottle with torch feels lighter than a new one from the shelf, the fuel is gone. Troubleshooting should always begin with this simple check, not with valve disassembly.
Expiry demands equal attention. Every canister carries a stamped date or a batch code. South African consumers should look for the SABS mark and a manufacturing year. After five years, the valve seals degrade even if the bottle remains sealed. Storage temperature and humidity accelerate that decay.
- Shake the bottle. A sloshing sound means liquid fuel remains, but a hollow ring signals nearly spent fuel.
- Inspect the base for rust or swelling. Those indicate internal pressure damage.
Trust these physical cues over memory when judging longevity. A silent, light, or untraceable gas bottle with torch is not worth the risk of a failed flame mid-task.
Cold Weather Handling and Pressure Fluctuations
Propane stops vaporising below about minus 42 degrees Celsius, but butane gives up at zero. So a gas bottle with torch that worked in Durban summer turns sulky on a Gauteng morning. Pressure fluctuations are physics, not a mechanical fault.
When the flame flickers, do not dismantle the valve. Warm the canister with your hands or stand it in a shallow water bath, never an open flame. For prolonged cold work, use fuel blends or an insulated glove. Seal longevity depends on how often the bottle freezes and thaws.
- Shake the bottle to feel for pressure, not just fuel.
- Store it at room temperature before use.
- Acclimatise the gas bottle with torch slowly to avoid condensation inside the regulator.
Rapid pressure swings wear out the o-ring faster than soldering. If you hear a hiss after the torch cools, replace the seal before the next job.
Creative and Practical Applications for Torch Gas Bottles
Culinary Finishing: Caramelizing and Searing
At a certain point, the humble crème brûlée becomes a test of patience. Professional pastry chefs often keep a separate gas bottle with torch solely for this task, because the sugar must be blistered the moment it sets. That timing separates a bitter, burnt skin from a glassy amber crust.
Culinary finishing extends far beyond desserts. A compact gas bottle with torch gives you precise, directional heat to sear the fat on a lamb chop, caramelize the top of a bobotie, or blush the edges of a grilled pepper. The flame stays tight enough to avoid cooking the interior while still building colour.
- Torching sugar on custards and meringues for a brittle shell
- Browning the surface of a sous vide steak without reheating the meat
- Melting cheese onto toast without turning the whole slice soggy
Each task relies on the control that a well matched torch and bottle provide, so the heat lands where you aim and nowhere else.
Precision Soldering for Electronics and Jewelry
One slip and a 2,000 Rand ring becomes a mound of silver slag. A gas bottle with torch prevents that slip by giving you a flame small enough to solder a jump ring without scorching the stone next to it. The same control helps electronics technicians repair circuit boards where a heat gun would be overkill. You target the solder joint, not the entire component.
Tasks like these demand precision:
- Repairing a silver chain link
- Reflowing a loose wire on a PCB
- Annealing a wire end after cutting
Each needs a steady hand and a fuel supply that delivers consistent pressure. A refillable gas bottle with torch suits a jeweller who works daily. Disposable versions fit the occasional repair. Both use the same valve mechanism, which holds the key to temperature control.
DIY Pipe Bending and Heat Shrink Tasks
Beyond soldering and searing, a gas bottle with torch earns its place in the workshop corner people overlook. Bending copper pipe demands targeted heat. You soften the metal along a precise zone, then curve it around a former. No kinks, no collapsed walls. Refrigeration lines, brake lines, even decorative handrails all benefit. The same technique applies to aluminium tubing, where a dull red glow signals the moment to bend.
Heat shrink tasks follow the same logic. A controlled flame shrinks insulation sleeving around spliced wires or terminal lugs, creating a watertight seal. The trick is movement. Keep the flame sweeping, never stationary.
Other jobs respond to localised warmth:
– Freeing seized nuts and bolts
– Shrinking nylon cord or leather ends
– Lifting old paint from metal edges
Each relies on the same principle. The gas bottle with torch delivers heat exactly where you want it, nothing more.
Automotive Rust Removal and Upholstery Repair
A seized calliper bolt can stall an entire brake job. A gas bottle with torch heats the metal housing around the bolt, expanding it just enough to crack the rust seal. The bolt then turns out with a breaker bar. No drilling, no damaged threads. In coastal South Africa, this saves hours on every second vehicle.
Common fasteners that respond to this treatment:
- Exhaust manifold studs
- Brake disc retaining screws
- Suspension arm bolts
Upholstery repair is the quieter use. Vinyl tears pull tight when warmed with a steady, sweeping flame. Seat covers shrink back into shape without burn marks. Heated patches bond firmly to the material beneath. I have repaired tears in a bakkie seat this way, and the results were clean!